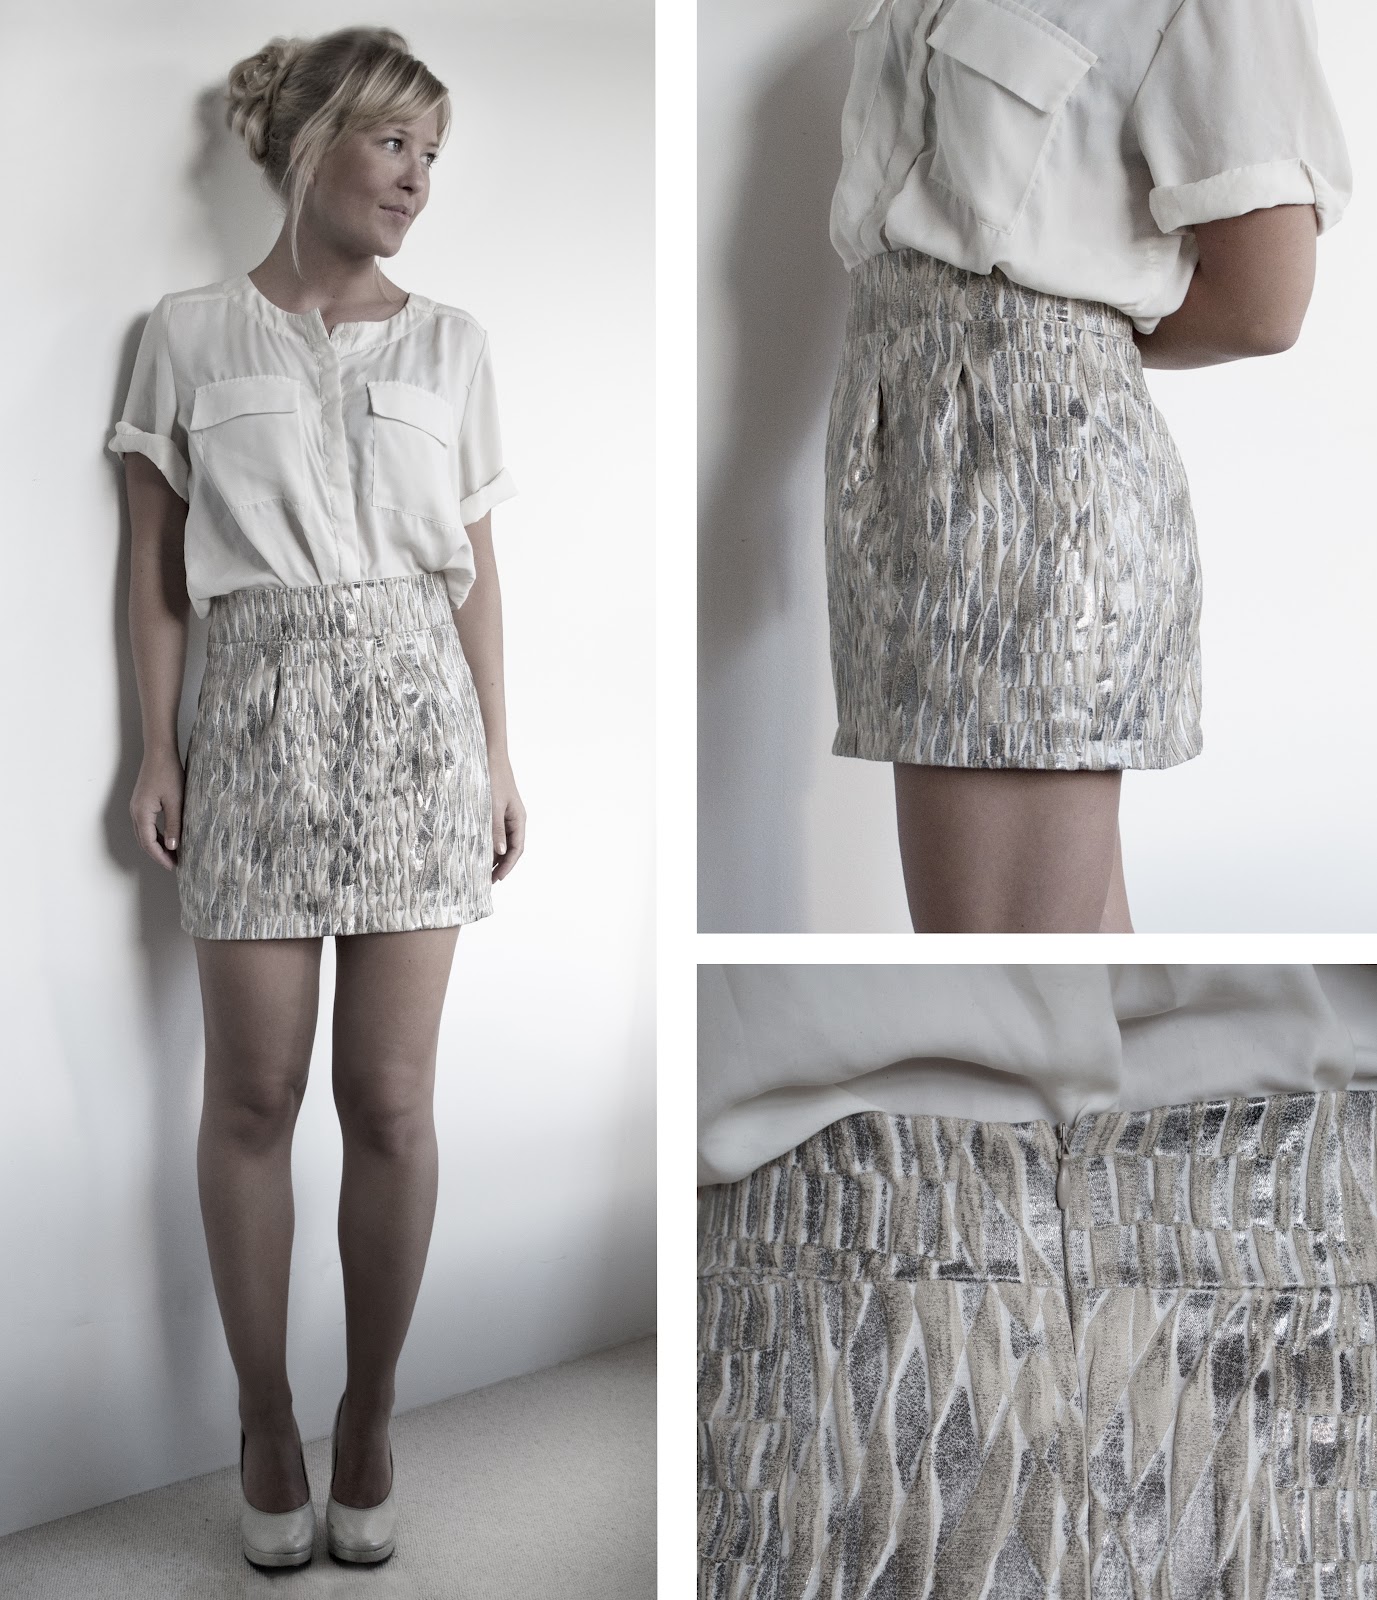
Yes! I finally made my own skirt (with clear instructions from my mother) and some additions here and there. Nothing much yet, but it's a start to my new sewing career - JK;-). It was a very basic skirt with an invisible zipper. I added some puffy darts front and back and a waist band, which was not originally a part of the pattern. The fabric, I got from the Cloth House on Berwick Street in London. Berwick street has lots of great fabric boutiques, but they are semi pricey. Goldhawk Road is another great street in London that is loaded with fabric shops and generally more price friendly than Berwick Street. If it wasn't for my upcoming travels to China, I probably would have bought a whole suitcase full of silks and chiffons!
Showing posts with label Design. Show all posts
Monday, August 6, 2012
Wednesday, July 4, 2012
Silver Gemstone Necklace
![]() |
| I saw these origami gemstones on http://www.minieco.co.uk/paper-gems/ which inspired me to make this necklace |
![]() |
| Hollow constructed Sterling silver and sterling silver plated with custom paperclip hinge. |
![]() | |
| . |
My class just finished and I already sold one of my pieces (not pictured) It was a smaller and single silver gemstone in a necklace. Pretty exciting :-) Happy 4th of July \!!/
Friday, June 29, 2012
Monday, June 18, 2012
DIY - Leather Scarf
I finally finished my deerskin lace scarf. To make it more fluffy and give it structure and volume, I used a patent knitting pattern - (I'm actually not sure what the correct name is in English - patent is the Danish name:-) The amount of masks must be divisible by 3 - I used 30 stitches with size 15 (10mm) needles. Start with knitting two together. Create one mask and lift one over. Repeat. You should always be starting a row knitting two together and finishing with lifting one mask over.
Friday, June 15, 2012
Irregular Sterling Silver Pentagon Rings
This week we've been learning different methods of setting stones, how to texture metal and create different patinas. I made these rings from sterling silver sheet metal. One of them is polished on the outside and brushed on the inside. The other one is made by reticulation, which means to heat up the metal with a torch so hot that it almost melts but only starts wrinkling or distorting. Tomorrow I'll be going to a gemstone show in KC. I'm really excited to start adding stones to the metal.
Monday, June 11, 2012
Hammered Brass Gold-plated Bracelet
Our first jewelry project was due today ( the other one was just for fun or because I wanted a bangle:-). The "Gypsy" piece is what our professor called it. There wasn't really a design strategy or an idea from the beginning, just start hammering, rolling and soldering. I started with a foot of 16 gauge round brass wire, hammered like crazy, annealed, soldered, sanded and polished and ended up with this leafy shaped bracelet. Gold-plated it. Finally getting excited about metal work!
Friday, June 8, 2012
Tuesday, May 29, 2012
DIY - Ipe Dining Table For Zero Dollars
I guess I'm running out of things to post on here because this project is from last fall. I'm enjoying my days off and being lazy by the pool haha... Anyway, this table was almost free because most materials were reclaimed or "donated" leftovers from other projects. Habitat restore or local wood shops are great places to look for deals on wood or other materials.
I started out by stripping the edges of the decking boards so they lined up perfectly. Then glued them together and clamped them for a day or two. I thought I could sand the surface by hand like I've done before with other woods, but Ipe is extremely dense and hard and demands a lot more horsepower than my little arms. Instead I ran it through a drum sander, which made the top completely smooth. Then oiled it, which made it darker and more even toned as well as giving it protection from general usage. The legs, which is one large piece of Ipe, was attached with a simple stainless steel L-bracket. Hurra cheap kitchen table!
Thursday, May 24, 2012
Modeling - Bending Wood
This conceptual model was a project for a beach pavilion my sophomore year of college. It was probably my first successful model in bending and manipulating wood. If the wood is reasonably thin (1/62" - 1/16" - plus you can layer it) you don't need a fancy vacuum press or a bunch of chemicals, just warm water and a little "massaging"- . When it is in position, tape it or clamp it down and let dry overnight. When it dries, it dries stiffer and is more likely to break than before.
Labels:
Architecture,
Design,
DIY,
model,
Tips,
Wood Bending
Tuesday, May 22, 2012
Last Year's School Project - Design and Build
Last year's project was a group project in a design and build studio. We learned how to work with metal, how to weld, wire lights and how to work on larger scale construction. The Hexagon structure is an adjustable facade that moves both vertically and horizontally creating a different facade look from the outside as well as a different viewing frame from the inside. It also casts playful shadows that move two ways. Everything is custom made and designed, even the hinges.
DIY Project - Origami Bracelet
Thursday, May 17, 2012
Tuesday, May 15, 2012
Subscribe to:
Posts (Atom)